Thursday, January 28, 2010

Our Favorite Cookie

Everyone who loves to bake has a favorite recipe or two. And I have seen countless lists and blogs of the best chocolate chip cookies or cookie recipe ever. I'm not going to claim that these chocolate chip cookies are the best recipe or the best ever but what I can tell you is they are my family's favorite cookie and even I, who don't care for chocolate chip cookies all that much, love them.

These cookies are based on a Cook's Illustrated recipe from one of my favorite baking books of all time, Baking Illustrated. A book that could only be more fabulous if, as it's title implies, it was actually illustrated with full color photographs for each recipe. Nothing sells me on a book more than food porn. Although, I daresay, this book stands alone on the merits of it's tried and true recipes.

Our cookies are not a traditional chocolate chip cookie but we are not exactly a traditional family so they're perfect for us.


Our Favorite Chocolate Chip Cookies


No, I do not put beer in my cookies, that green bottle in the back is homemade vanilla extract.

Heat oven to 325 and line 2 large cookie sheets with parchment or silpat

- 2 cups White Whole Wheat Flour (King Arthur makes the best one)
- 1/2 tsp. Baking Soda
- 1 tsp. Sea Salt
- 1 and 1/2 sticks of Butter that has been melted and cooled for at least 10 minutes
- 1 and 1/2 cup Dark or Light Brown Sugar
- 1 Egg plus 1 Egg yolk
- 2 tsp. Vanilla Extract
- 1 cup loosely measured (don't pack it down) Sweetened Flaked Coconut
- 1/2 cup Toffee Bits (I like Heath brand, you can also chop 2-3 Heath or Skor bars)
- 1/2 to 1 cup Dark Chocolate Chips or chopped Dark Chocolate

In a small bowl, whisk the first three ingredients and set aside.
In the bowl of a standing mixer (or with a hand mixer or even with your hand) add your sugar and melted butter and cream for two or three minutes.
Beat in your egg and egg yolk and the vanilla extract until well combined.
Scrape down the sides of the bowl and add your dry ingredients. Beat for no more than a few seconds, just to combine.
Add the coconut, toffee chips, and dark chocolate and mix by hand until evenly distributed but do not over mix.
Let cookies rest in the fridge for 15 to 30 minutes.


Drop cookies by tablespoonfuls onto your carefully prepared cookies sheets. Here's where we will use our imaginations to pretend that I did not forget to line my cookie sheets.

Bake for 12-15 minutes. We like ours perfectly balanced between moist centers and crispy edges so I eyeball it. Eyeballing is an art, you know. :)


These never last very long but I am willing to bet the dough balls freeze well. Just portion the cookie dough out onto a cookie sheet and stick the whole sheet in the freezer until firm. Pop the dough off and into a plastic baggie or container and bake off a few at a time. I'm going to have to try that one day...

Monday, January 25, 2010

Lasagna in Bianco


I don't know about you but for me, the best way to show me you love me is to cook for me. I love being cooked for but since I also love to cook and I am home, it falls that I am usually the one doing the cooking. Which is fine. Although, I do like to remember back when A. was a-courting me...he quickly figured out the way to my heart was through my taste buds and there were many meals where I got to sit and read a book or a magazine while he rushed around the kitchen trying to impress me. And sometimes he did. The first time I recall being really impressed with something he made was when he made lasagna. It was a fennel and mushroom lasagna from Epicurious and to this day, it's his go to meal when he has to cook.

Around Christmas time we were planning on bringing food to his parent's house for dinner and we decided that A. would make his lasagna and I would make a white lasagna. Lasagna in Bianco. I did some research and found a good recipe to use as a template but last night when I made it again I veered from my first attempt and decided to wing it. As so often happens, I had things in the fridge I wanted to use up so I made it work. And I'm so glad I did because it turned out perfectly.

Now lasagna takes a little bit of work but nothing that can't be handled by breaking it down into steps. Steps make everything easier. Baby steps. As in life. As in lasagna.

Step One. What are you going to put in your lasagna? I had some broccolini that was starting to look a little worse for the wear, some carrots I had just picked up from the farmer's market and a basket of mushrooms that needed to be eaten soon. I got to work prepping my veggies. First I sauteed 4 to 6 thinly sliced carrots in a bit of butter and olive oil. I popped a lid on them for a few minutes to let them steam and then I finished them off just until they started to get some brown spots. Set them in a bowl and pop the pan back on the heat, swirl in a bit more olive oil and then I tossed in my chopped broccolini which I had parboiled for a minute or two. I seasoned the broccolini (3 bunches) with minced garlic (6 cloves) and salt and red pepper flakes. I just sauteed the broccolini until it picked up the flavors of the garlic and red pepper flakes. Set the broccolini aside in another bowl and wipe out the skillet with a paper towel. Throw in a small chunk of butter and then add the sliced mushrooms. Sautee the mushrooms until golden and set them aside with the other vegetables.


Step two. Make your bechamel. This is your white sauce. Now this is the sauce that is going to flavor your lasagna noodles so you want to infuse some flavor into it. There is nothing worse than a bland and pasty bechamel. Start by measuring out 3-4 cups of whole milk or a combination of heavy cream and skim milk, half and half and 2% whatever you have on hand, short of straight skim milk should work. Nothing leaner than 2% though. Put the milk in a saucepan (I used one cup heavy cream and 3 cups skim milk because that's what I had in the house.) Bonus points if your cream is from here.


Battenkill Valley Creamery. I live down the hill from them...well, down the hill and over the mountain but really, right around the corner.

Put your cream into a saucepan and warm it up. I like to add some flattened cloves of garlic. Flatten with the side of a knife so the flavor is exuded into the milk and they're easy to fish out later. I also added a Parmesan rind to mine. Always save your Parmesan rinds they add fantastic flavor and umami to all sorts of things. If you don't save them, don't tell me- it will break my heart.

I like to give my milk a while to simmer to get the most flavor out of my garlic and Parmesan rind. I usually let it simmer for a half an hour or so. Just be careful milk has a tendency to boil over and make a huge mess. Low heat, low heat.

Once I feel that I have enough flavor infused into my milk, I start the bechamel. In another saucepan I melt a half stick of butter. When it starts to foam, toss in 1/4 cup of white flour and whisk like mad. This is not the time to check your email. You whisk, whisk, whisk until the raw flour smell starts to fade and the flour starts to color. As soon as that happens, start adding your milk. I like to add mine a little at a time and just whisk like crazy because I find the final product is smoother. Once all your milk is incorporated, taste it. Add salt. Taste it again. If you really want to round out the flavors and add a little something special, grate some fresh nutmeg on top. I don't know why, but most white sauces and cheese sauces benefit from a grating of nutmeg. Try it.


Step three. Make your ricotta filling. Not much to this. I used 3 cups of ricotta and two large eggs. Whisk until smooth.

Step four. Assemble your lasagna. In the bottom of a 9x13 pan, add a ladle full of bechamel, three lasagna noodles (I'm partial to Barilla No Cook Noodles), spoon on some ricotta and sprinkle with your vegetables. I did broccolini topped with carrots and then mushrooms. Drizzle the veggies with more bechamel and then add more noodles, more ricotta, more veggies, more bechamel...


and so on until you reach as many layers as you'd like. I had 4 layers. Spoon the rest of the bechamel over the top and cover with foil. Bake at 375 degrees for 40-50 minutes. And the most important step of all? Let your lasagna rest. Do not even think about cutting into it until it's rested at least 15 but preferably 20 minutes. I'm so impatient that I had to take a shower while mine was resting because I didn't trust myself.

Do you enjoy having someone make a meal for you?

Thursday, January 21, 2010

More than the sum of it's parts...


Sometimes a delicious dinner comes from exhaustively researching a recipe, sometimes it's a family favorite, tried and true. And sometimes you open the refrigerator and find a head of cauliflower just slightly past it's prime and not much else. You know everyone loves roasted cauliflower but you can't just have that for dinner (unless you are alone and then anything goes...) now there are children and a hard working man to feed and they require something a little heartier. There's pasta. Everyone loves pasta.

You set a pot of water on to boil, generously salted like the sea.

Get the oven going. I like 450 degrees for roasting.

You chop that head of cauliflower in to bite sized chunks. If you are like me and are unable to buy one of anything, you chop the one head of cauliflower and then you chop half of another head. I like a roughly equal ratio of pasta to vegetables. Makes me feel virtuous.


Drizzle on some good olive oil and sprinkle with sea salt and lots of freshly ground pepper. Pop it in the oven and let it go until it looks like...


This. Never mind that I used a tad bit too much olive oil. I spaced out while I was pouring. It will be okay, after all, it's all the moisture this pasta will get. All it needs, really.

Drain the pasta and toss it with the cauliflower and olive oil. I served ours with chopped, fresh mozzarella but it's absolutely delicious without it. It's amazing what can become of three ingredients and necessity.


Don't be fooled by the palette of beige and white, I assure you the sweet, almost nutty roasted cauliflower and the slightly grainy taste of the whole grain pasta are perfectly enhanced by a nicely fruity olive oil and creamy mozzarella. It's one of our favorite pasta dishes now.

What do you like to make when the cupboards are just this close to being bare?

Monday, January 18, 2010

Turning fantasies into realities or How I Taught Myself to Make Pupusas


Last summer on a visit to NYC (why do so many of my food memories originate there?) I was strolling the flea market in DUMBO when I smelled something delicious. Up ahead was a food booth with a long, long line. Wondering what people were waiting for in the hot summer sun, I ventured forth and saw it was a pupusa stand. What are pupusas, I thought to myself? They looked like some kind of corn pancake and appeared to be stuffed. Not wasting any more time I made a quick decision that that was where we were getting our lunch and I joined the line like a good little sheep.

And boy was I glad I did. We all tried various fillings, I believe there was pork and beans and cheese and we ate them standing on the street using a ledge to balance our drinks. I almost got back on line for seconds but we had a busy, food filled itinerary and there was still Almondine and Jacques Torres to be visited.

With all the wonderful things we saw and ate on that trip the one that stood out and the one we all thought of as our best or one of our best was those pupusas. At home I researched them on the internet and saw that they were a Salvadoran staple. At the end of that same summer we decided to take a spur of the moment trip to Old Orchard Beach Maine and imagine my delight when researching restaurants on the morning of the trip I kept reading about this little Salvadoran hole in the wall in Portland (a foodie wonderland if ever there was one.)

We managed to have a lunch there and of course we ordered pupusas. Unfortunately, they weren't as good as the ones we ate in Brooklyn and they left me longing for those we ate that hot summer day standing in the street.

For some reason it never occurred to me to make pupusas myself. I thought about them. I even found a recipe in the Rancho Gordo cookbook. But then for Christmas I was given an electric griddle and in thinking of what I could make on it besides pancakes, pupusas came to mind. The first time I made them I used the Rancho Gordo recipe as a template and made refried beans to stuff the pupusas with and curtido which is kind of a mayonnaise free cole slaw that's traditionally served atop the pupusas. They were good but not the bursting with filling goodness that I had eaten in Brooklyn. And they were kind of hard to form. Heading to the internet I found this http://www.videojug.com/webvideo/how-to-make-pupusas and I started to see where I went wrong. There are tons of videos on how to make pupusas. I watched them and got a better idea of how to make pupusas like those I ate in Brooklyn. It was all in the technique and my second batch was a winner.

Pupusa Dough

2 cups Masa Harina
generous pinch of salt
1 to 1 1/2 cup water.

Mix together masa harina and salt and drizzle the water over the top.
Stir or mix with your hands (my choice as it's easier to get a feel for the right consistency) basically, you want a dough that will hold up to being flattened out and stuffed. Not too moist and not too dry.


Filling

Refried Beans and Monterey Jack


Curtido (my adaption)

Half a head of cabbage, thinly sliced
3 Carrots grated by hand or in a food processor
One onion, thinly sliced (I left it out as I don't do raw onion)
1/2 cup white vinegar
1/2 cup water
generous pinch of red pepper flakes
tsp oregano
generous pinch or two of salt
TBS grainy mustard

Toss together the cabbage, carrots and onion.
Mix the vinegar, water, red pepper flakes, oregano, salt and mustard.
Toss with the vegetables and refrigerate for at least two hours to allow the flavors to meld.

I didn't do that step because I happen to like cole slaw when it's freshly prepared before the veggies start to get limp. I did have this the next day though and it was still good with minimal limpness.

Pinch off a handful of dough (golf ball size) and flatten it out in the palm of your hand and kind of curl the edges up into a little cup. (this is where I found the videos really helpful) Stuff a generous amount of filling into the well and top with a large pinch of cheese. Bring the edges up and close over the filling. As best as you can flatten the ball out into a thick pancake while keeping the filling covered. The best advice I read was that it's okay if there are some cracks because those are going to be delicious crispy oozy spots when they are fried up on the griddle.

Heat your griddle or frying pan as you would for pancakes. I coated my griddle in canola spray and set the temperature to 300. Fry each side for 3-4 minutes. Top each pupusa with a spoonful of curtido and then you can spoon on some sour cream (thinned with milk to replicate crema) or salsa. We had ours both ways, one night with curtido and sour cream and one night with curtido and salsa. I preferred the salsa and curtido on mine.

These were really fun to make and after watching the videos I found I had a better grasp of how they should be formed. I think I'm going to be playing with this recipe some more. I'm thinking they will be fabulous stuffed with shredded pork and caramelized onions...


Thursday, January 14, 2010

French Intimidation

AKA How I overcame my fear of making French macarons. I have only had one macaron in my life. It was at Kee's Chocolates in NYC. We were visiting them as a destination on a foodie walking tour and really stopped in for their chocolates, which are wonderful, but when I saw their display of lovely jewel toned macarons, I had to try one. I chose the rosewater lychee macaron and as soon as we were out on the sidewalk I took it out to taste it and it tasted just as good as I thought it would. The crisp shell yielded to reveal a soft and slightly toothsome center with an intriguing bit of lychee buttercream. It was an ethereal treat between the flavors and the light as air texture. It was so good- I immediately became obsessed with macarons. Of course, no longer living in the city I do not have ready access to such delights so I have mostly obsessed from afar. Meaning lots and lots of time on the internet.

I knew I wanted to make some but there is a certain intimidation factor to making your own macarons. And then I found the Mac Tweets blog www.mactweets.blogspot.com which had tons of pictures and links to other macaron makers. I wanted in. I obsessively searched for the perfect recipe. It had to be one that had the ingredients listed in volume as I still have not broken down and purchased a food scale, though one is at the top of my Amazon wish list. And then there was the matter of the almond flour. Do I make my own? Do I search out a source? Order it online? I found some at a pricey health food store in Saratoga- twelve dollars for a small bag!? Ouch. So now I had the ingredients and the equipment, which is nothing special- cookie sheets lined with parchment, something to pipe the macaron batter...I had everything. It was time.

Recipe from A La Cuisine www.alacuisine.org

Macaron Batter

- 1 ¼ cups confectioners sugar
- 1 cup almond flour or finely ground almonds
- ¼ cup plus 2 TBS egg whites at room temperature
- pinch of salt
- ¼ cup granulated sugar

Allow egg whites to thicken by leaving them uncovered at room temperature overnight.

On three pieces of parchment, use a pencil to draw 1-inch circles about 2 inches apart. Flip each sheet over and place each sheet on a baking sheet.

Push almond flour through a sieve, and sift confectioners sugar. Mix the almonds and confectioners sugar in a bowl and set aside.

In a large clean, dry bowl whip egg whites with salt on medium speed until foamy. Increase the speed to high and gradually add granulated sugar. Continue to whip to stiff peaks – the whites should be firm and shiny.

With a flexible spatula, gently fold in the confectioners sugar mixture into the egg whites until completely incorporated. The mixture should be shiny and ‘flow like magma.’ When small peaks dissolve to a flat surface, stop mixing.

Fit a piping bag with a 3/8-inch round tip. Pipe the batter onto the baking sheets, in the previously drawn circles. Tap the underside of the baking sheet to remove air bubbles. Let dry at room temperature for 1 or 2 hours to allow skins to form.

Bake, in a 325F oven for 10 to 11 minutes. Use a wooden spoon to keep the oven door slightly ajar, and rotate the baking sheet after 5 minutes for even baking.

Remove macarons from oven and transfer parchment to a cooling rack. When cool, slide a metal offset spatula or pairing knife underneath the macaron to remove from parchment.

Pair macarons of similar size, and pipe about ½ tsp of the filling onto one of the macarons. Sandwich macarons, and refrigerate to allow flavours to blend together. Bring back to room temperature before serving.


Macaron shells waiting to be slathered with caramel buttercream...


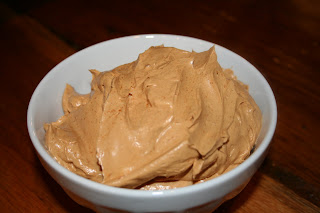
That is not a finger swipe mark in my salted caramel buttercream. Okay, of course it is. Be happy my face print is not in there. It's that good.


I probably should not be left alone with these.

Monday, January 11, 2010

These are a few of my favorite things...

Everyone has things in their kitchen that they can't live with out. These are the things that make me love being in my kitchen.


I bake a lot so these wide mouth glass jars that each hold 10 pounds of flour or sugar are perfect. I won't tell you how often I refill my sugar jar because it's probably more often than most people have to buy sugar.


Yes, it's just a notebook but it's an indispensable tool for keeping me organized. I keep it on my kitchen counter so I can jot down ingredients or make to do lists as I go and when I leave the house I always take it with me.


My long coveted KitchenAid mixer. I went through FIVE hand mixers in 4 years. I wanted a KitchenAid but I couldn't see committing to spending that much money. I'm frugal. Sort of. But thanks to a deep Black Friday discount, this long coveted mixer is mine. And I love it. Tip: I keep mine on top of a folded up dish towel so when I want to use it I slide it on the counter instead of trying to pick it up, it weighs a lot and it's cumbersome to move.


My food processor. I had one many years ago and I never used it. So I sold it. At a garage sale. For practically nothing. Luckily, the same person who got me the sold food processor took pity on me and several years later got me another one for my birthday. This time I got smart and instead of storing the food processor away in a cabinet I leave it right on my counter. Suddenly I can't live without it. I use it at least twice a week, often more. It's true what they say- location, location, location!


My cookbook collection. Condensed through the years. I try to be very careful with the books I buy now. It's just as easy to get a recipe off the internet and many times I do just that, but there is just no substitute for a wonderfully edited cookbook with photographs. I'm a sucker for photographs. I'm a book lover so I get a little sentimental over my collection, each book is important to me. In the corner is my recipe binder with clippings and some of my most cherished recipes written in long hand. I hope one day someone appreciates that book.


French press = best coffee ever. In my humble opinion, of course. This is a thermal carafe that I agonized over. I could have saved myself a few bucks and purchased a regular French press because the thermal qualities of this one are a joke. Hot coffee for half an hour max. Still, it's wonderful coffee and I can always buy a thermos.


If you are going to go the French press route, you have to have properly ground beans. A burr grinder will be necessary. This one is highly rated and one of the few under a hundred dollars.


I'm not sure what I did in the kitchen before I found Microplanes. The thinner one is perfect for grating nutmeg (you do buy whole nutmeg, don't you? It's nothing like pre ground nutmeg) and zesting citrus. The larger one is my parmesan grater. That's it. I just grate parmesan with is but I use it at least twice a week and no other tool grates parmesan like the microplane. Mmmm, fluffy parmesan clouds.

How about you? What are your indispensable kitchen tools?